Publish Paid Groups
This document provides a quick guide on how to publish paid groups.
Terminology
Paid Group
A paid group refers to a group or community that requires payment for membership.
Membership Validity Period
Some group scenarios support setting a validity period, which limits the time a user can stay in the group. After the period expires, the user needs to renew their membership to stay in the group; otherwise, they will be removed.
Steps
1. Create a Project
Go to the console Merchant Center, click to create a project, and select Paid Group as the product type.
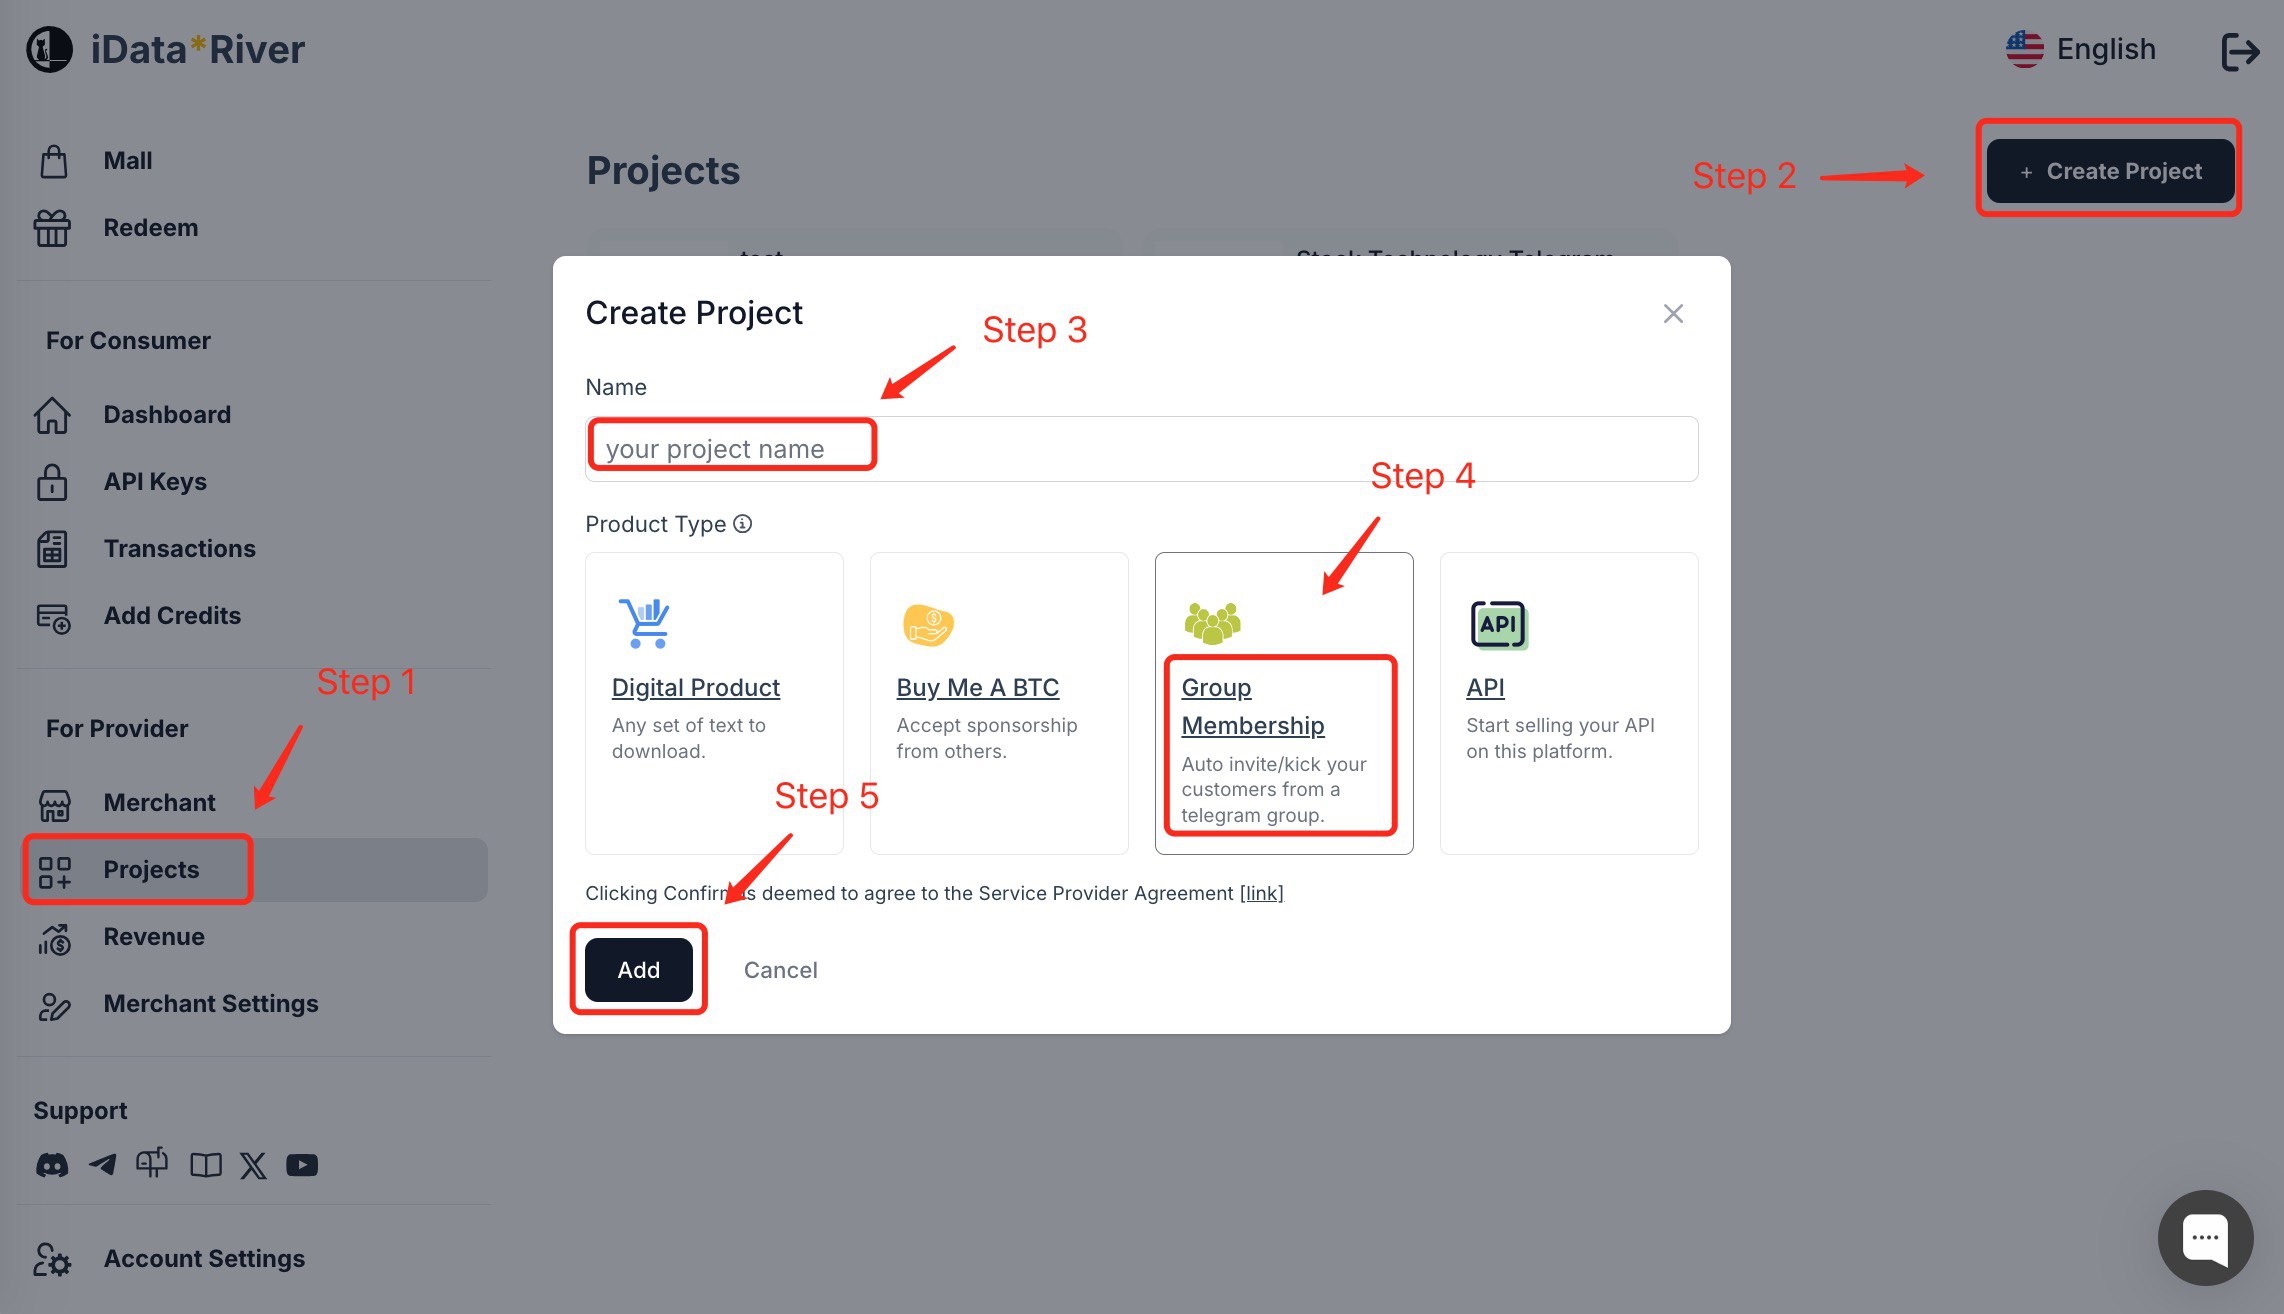
Once created, click on the project to enter the management page.
2. Fill in Basic Project Information
On the project homepage, you can complete the relevant configurations. You can upload your project's cover image and click save to apply the changes.

3. Create a Product
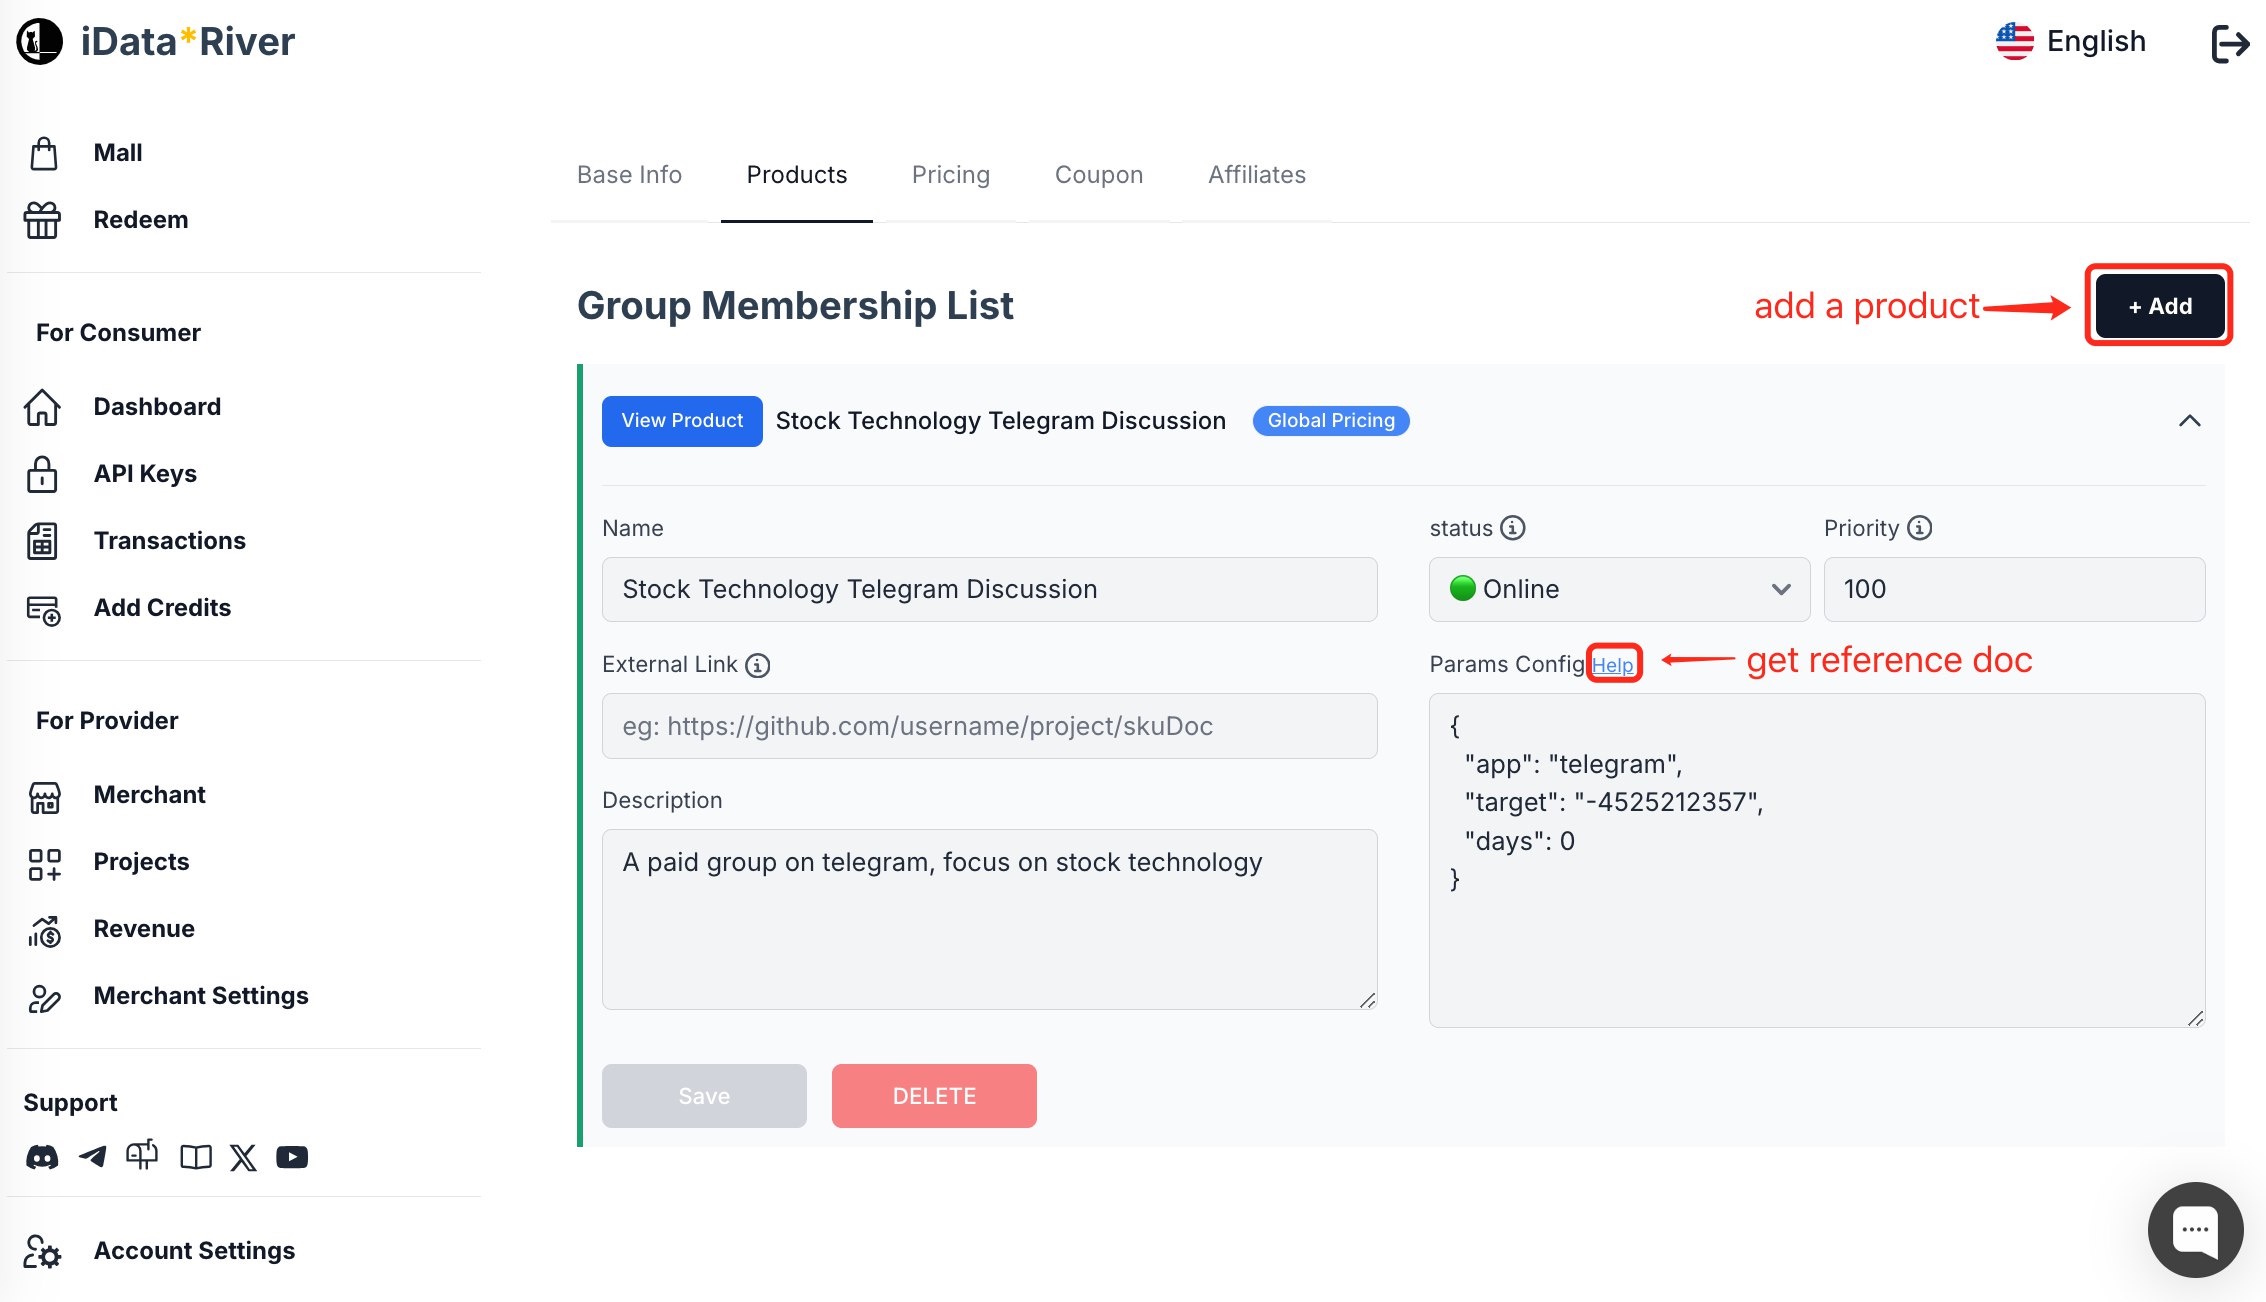
Currently, Telegram channel/group are supported. The explanation for the configuration parameters field is as follows:
- app: Enter the fixed value
telegram - target: Your
telegramchannel/group ID, usually in the format:-1002233168401. See below for how to obtain it. - days: Membership validity period (days). Enter 0 for a lifetime membership, and 30 for a membership that will be automatically removed after 30 days.
Telegram Paid Group Usage Process
- Create the required paid group on
Telegram(skip if already done) and set it toprivatemode, meaning public access is not allowed. - Add the platform-provided official free
Telegram bot@iDataRiver_Botor yourmerchant-customized Telegram botto the group and grant it admin permissions (including invite/kick permissions). - Click the
Copy Commandbutton in the product page, and send the copied content to the group by admin account, such as:/config M_***, then the bot will reply to you with theconfiguration parameters, you should copy the returned text directly to the product configuration. - After purchasing membership (whether from the web or the Telegram bot), users will receive a
redemption code, which they can give to others for use. - After obtaining the
redemption code, users must send it to the bot mentioned in step 2. New members will receive a join link (click to join), while existing members will automatically renew. - When the user's membership expires, the bot will automatically remove them from the group.
Important!!! Telegram Notes
- The bot must have the correct permissions; otherwise, operations will fail. If the bot is banned, replace it as soon as possible.
- A join link can only be used once. Even if the user leaves the group, they cannot use the previous link to rejoin.
- If the bot's permissions or group issues cause invite/remove failures, merchants bear the consequences.
- If the merchant purchases a custom bot, it will be used for kicking members; otherwise, the default official free bot will be used. Ensure the bot has the correct group management permissions.
[Advanced Usage] Bind multiple telegram paid groups at the same time
You can set multiple paid groups during configuration, so that when users use the redemption code, they will auto redeem multiple group links.
Please make sure that each group is configured effectively, otherwise some groups may not be able to successfully redeem the group link.
Notes before use:
- The redemption code will only become invalid after all paid groups have been successfully redeemed
- If one or more paid groups fail to generate group links, the redemption code can be tried again
- When retrying the redemption code, the previously successfully redeemed paid groups will be auto skipped, and only the failed paid groups will be re-executed
- Add up to 5 groups at the same time
How to use:
Please first obtain the configuration of each group according to the previous process (example below).
{
"app": "telegram",
"target": "-1002227799999",
"days": 0
}
Merge the target field values in each group configuration together and separate them with English commas , (example below).
{
"app": "telegram",
"target": "-1002227799999,-1002227788888",
"days": 0
}
Save the configuration, and the group invite links corresponding to group id -1002227799999 and -1002227788888 will be returned during redemption.
4. Configure Pricing Plan
Each paid group for online sale must be bound to a pricing plan. Therefore, you need to create a pricing plan on the project management page and bind it to the corresponding paid group product.
5. Publish
Go to the project homepage and set the status to Online to complete the listing. The platform will automatically generate the project homepage based on the product configuration information.